Showing posts with label Simplicity. Show all posts

Saturday, August 27, 2011

"Color Is My Day-Long Obsession, Joy and Torment"

~ Claude Monet ~

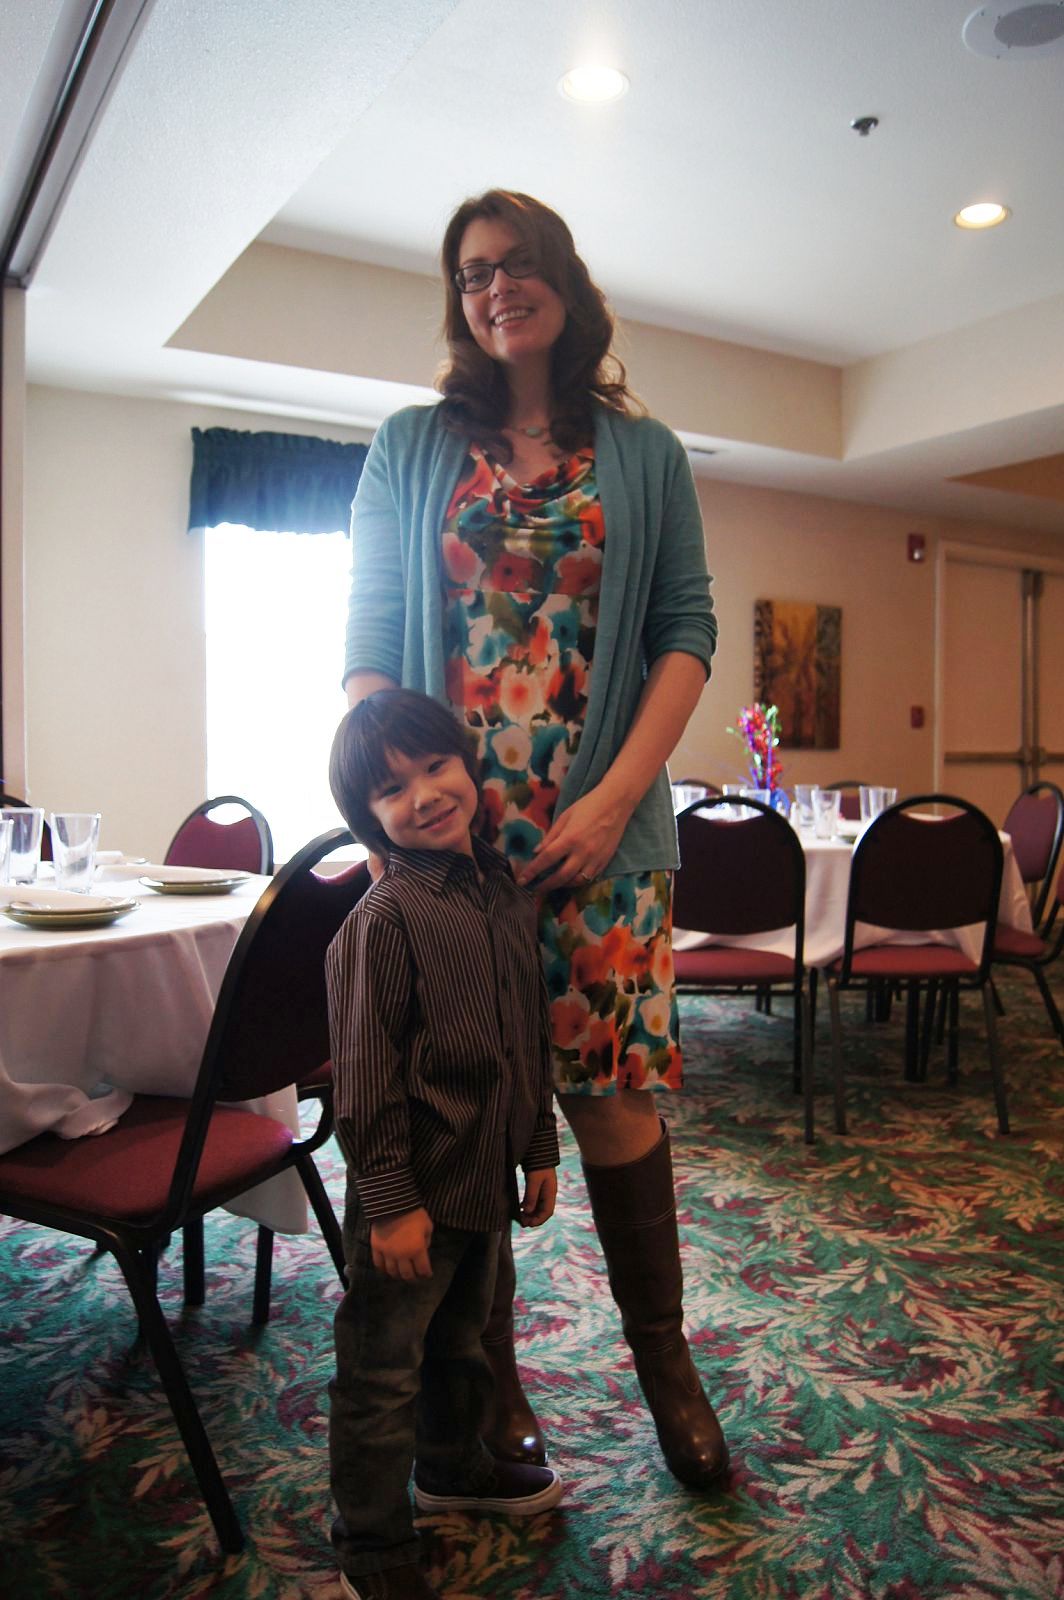
Over-exposed, I know.  But the backyard was bright, and I had to set the exposure ahead of time for Mr. flyskim.  I think we've all had the dilemma of wanting a good shot but not wanting someone to have to take 9,000 pictures for you, so once he got something semi-in focus, I called it good enough.
So, as I mentioned earlier, there's actually been a good amount of sewing but not much blogging here at Chez flyskim.  My friend H got married at the end of July, and for once, I wanted to actually finish a project in time to actually wear it as intended.


Enter Simplicity 2176.  H got married in her mother's backyard, so I knew that I wanted something lightweight and summery.  I had this pretty cotton stretch sateen from a spring fabric.com order that fit the bill, and I thought that the vintage feel of the Simplicity pattern would suit the fabric beautifully.  For once, I seem to have done a good job pairing the fabric to the pattern, because this dress is just what a summer sundress should be:  light, airy and yet with a little body and shape. 


The pattern was simple to put together.  A princess-seamed bodice with a top band.  I made a size 12 in the bodice with my usual full-bust adjustment (dropped the bust point 1 3/4 inches and then added about 3 inches in total fullness). The full bust adjustment did not affect the bodice band itself, so I cut the size 12.  Then I freaked out a little and added 1/2 inch at each side seam for insurance, and it turns out that I needed it.  I have tried starting with a 14 recently because of this exact problem, but I've ended up with a lot more fit issues that have just frustrated me, so I took a chance and went with the 12 this time.  Turned out well because the fit around the bodice is great. 

I used the thicker straps because I wanted the option of wearing a standard bra and still be able to take off my sweater if I wanted (you eventually reach and age when visible bra straps are just tacky).  This means that I did not use the markings given for attaching the straps.  Instead, I tried the dress on without straps and pinned them on to match my bra straps.  Because the straps are sandwiched it between the top band and the facing, you need to do this prior to attaching the facing for this to work.  In reality, it turns out that I didn't need to worry about it so much because I actually prefer the dress with the sweater.

Oops.  I was in such a hurry to wear this, I haven't tacked down the facings yet.  Better see to that.
I also cut a 16 in the skirt but had to bring it in a little at the side seams, not because I should have cut the smaller sized but because the skirt seems a little large to me.  This is straightforward because the pleating on the skirt does not alter from size to size.  The size of the skirt is entirely dependent on the side seam.

The lace was a simple addition.  When I first planned the dress, I expected to have to catch the lace in the seam between the bodice band and the skirt band, but the instructions just have you tack it on to the outside.  I started out by hand sewing the bodice lace on because I thought that would be less visible, but that was time consuming, and since my hand stitches didn't seem to show, I took a chance and stitched the skirt lace on by machine.  Good thing, too, because I finished this up right before lunch on the day of the wedding. 


All in all, a very successful venture.  I did think that this dress was going to be pretty versatile, but I've discovered that it's a little too dressy for general weekend wear for me.  But with a cardigan, it's a pretty addition to my business casual work wardrobe. It's probably because I like the look of this dress better on me with a sweater as it's been too hot around here lately to wear one if there's no air-conditioning (which we only have in the bedroom) and by the time it's general sweater weather again, the dress will be too summery for me.  Something else for me to consider in the future when planning garments.

Tuesday, March 22, 2011

The Cloak of Indignation?

It's been nothing but kitty pandemonium around chez flyskim lately.  The boy cat had a mass on the back of his leg that the vet has had us monitoring for changes in size and appearance for the last year.  These are supposedly common enough that it wasn't worth putting the little man through the trauma of having it removed unless there was a reason for suspicion.  However, someone forgot to mention that even if the mass didn't change at all, it could still rupture.  And that's exactly what happened last week, so off we went to the vet.  The result? 

One consultation and minor surgical procedure later, we have a non-lumpy but pretty annoyed little Hyde with a shaved hind leg, two fewer teeth (a longstanding problem) and a nifty, new fashion accessory. 

Our boy in his e-collar
We keep trying to tell him that it's better than the cone, but we haven't been able to convince him that this is not the most horrid form of torture ever.  Not only can he not hide under the bed, but the girl cat has become all aggressive and territorial and he can't even indulge himself with a good groom.


He tries, but he just keeps grooming the collar.  He's managed to get to his front feet, which means he can wash his face, and one of his back legs.  Wouldn't you know that it's the leg with the stitches?  He hasn't pulled them out yet, so we're just keeping an eye on it. 


And as if the collar and the problems with mobility and grooming weren't enough, the monkeys who control the food keep taking pictures of his pain.  The one bright spot in this for our little boy is that he's been feasting on the canned food he loves but we won't usually give him.

So, we've been a little distracted around here, to say the least.  Don't even get me started with the girl cat.  We've tried separating them, spraying Feliway, feeding them the same food (Pip's waistline is not thanking us), praise and treats for not growling, but the girlie is just not backing down.  And we have to take Hyde back to the vet next week to get his stitches removed, so even if we can restore the status quo by the end of the week (the usual readjustment period), it's just going to start back up again.  We'd take her to the vet with us, but that's actually an even more traumatic ordeal that involves sneaking up on her with a very large towel and usually results in maiming.  Us, not her.  And the vet. 


I have, however, been able to work on a Talbot's inspiration dress.  I'm making Simplicity 2917 (view A in the shorter length as suggested on Pins and Needles) using a lightweight, stretch denim.  The fabric has a slight metallic weave to it, so it has a pretty sheen.  The fitting went well, and I started the sewing last night.  I'll report back on this later.

She seems so innocent when she's boning up on her sewing skills.
Until then, wish us luck in surviving the bad mood that is currently Pip.

Thursday, March 10, 2011

A Forest Bird Never Wants a Cage

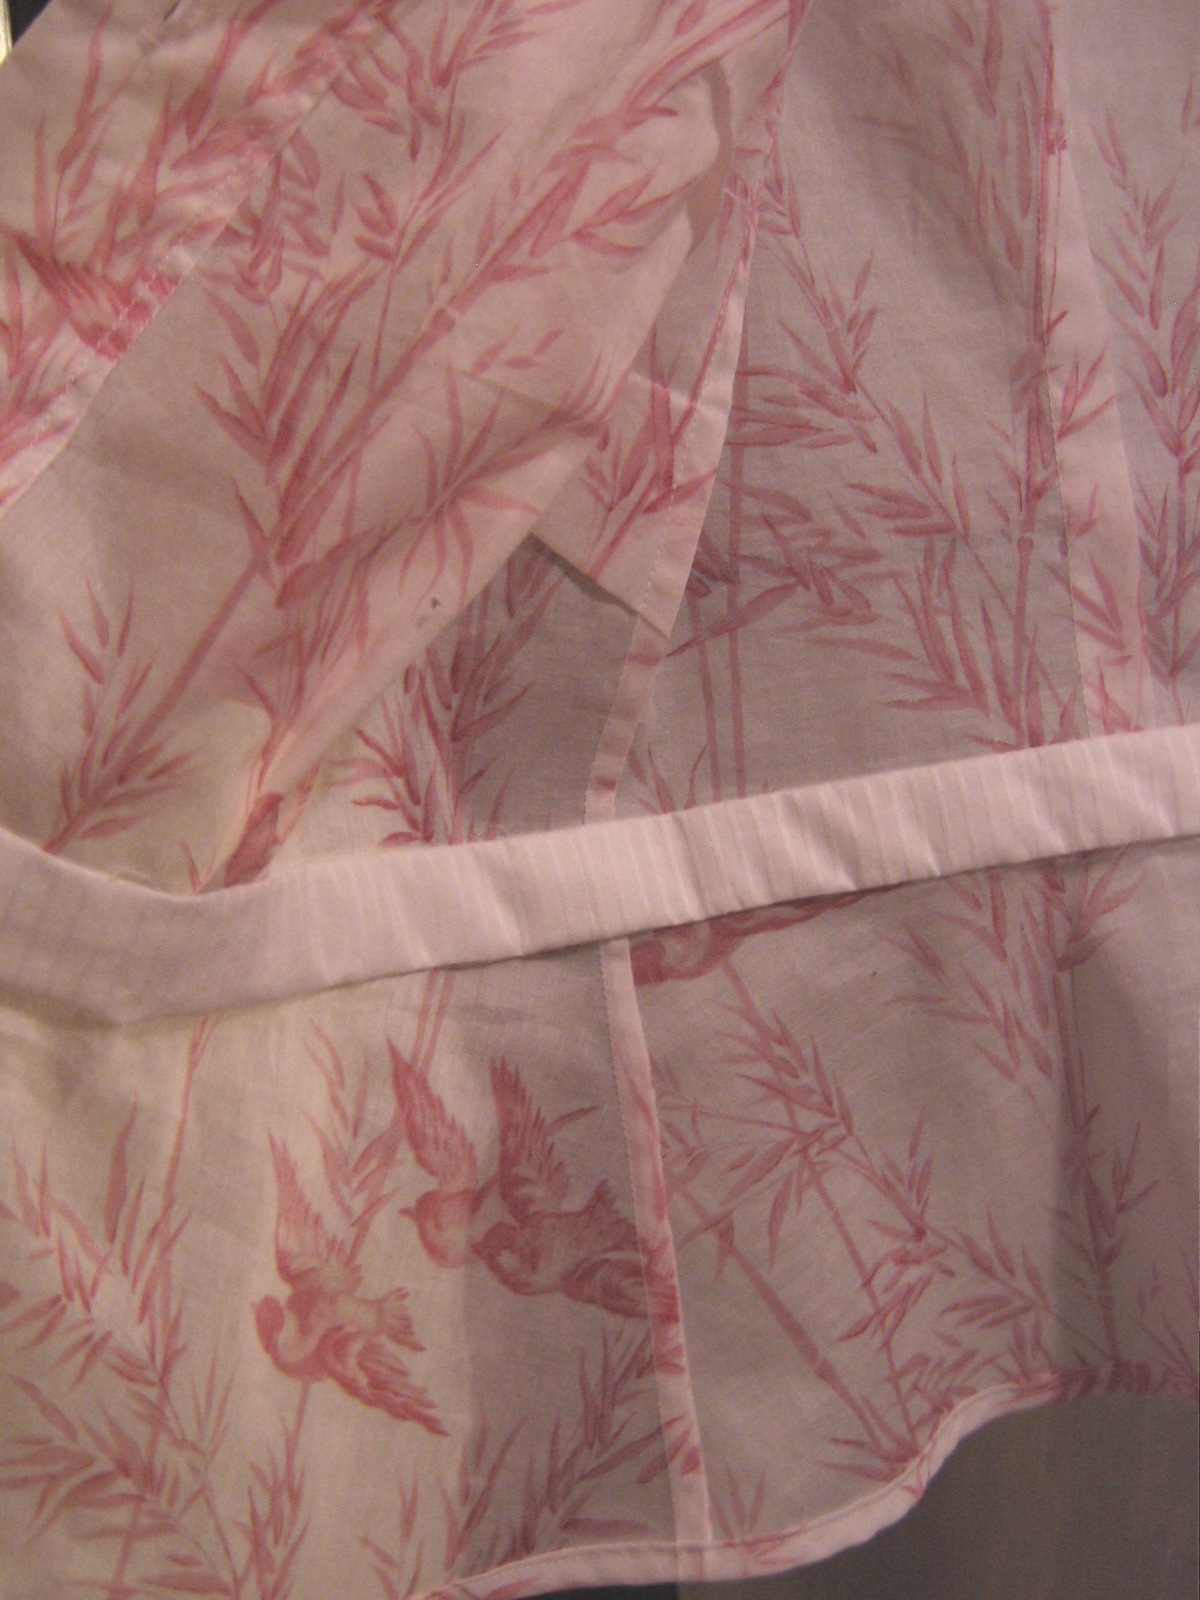
Pink finch and linnet bird?  Maybe not.
 I've recently finished Simplicity 2501, and while I'm really proud of my work on this blouse, it's been a learning experience.  Let me just warn you before we get too far that despite my best intentions, this is about a size too small and a good three inches too short.  However, there are a lot of things to love about this blouse, too.  I made View D with the short sleeves.  I originally wanted to do View D with the sleeves as shown on the envelope, but since I bought the fabric before I knew exactly what pattern I was going to make with it, I didn't have enough. 

I used this beautiful cotton voile that I purchased at Mill End Store last summer.  It kills me that I don't have this fabric to make something for myself anymore, because I was in love with this material.  It's so light and airy that it's perfect for summer.  I think I saw this fabric still available earlier this winter, so I think I might venture back to see if I can get some more.

Here's the blouse on me.

Huh.  From here, it doesn't look too bad, but trust me.  I barely got it buttoned at the waist.
Lesson #1:  Retake your measurements regularly, particularly if you suspect that you might have changed sizes.

I started with a size 12; however, I suspect that I should have gone up to the 14, so even though I did pattern fit this and do a slight full bust adjustment, it still didn't give me quite enough room for comfort, both physical and mental.

I think the bad fit might be a little clearer in this shot.  You can really see how short this turned out on me and the gaping of the buttons.  I'm not particularly long-waisted or tall, so the length (or lack of it) surprised me, especially since it doesn't look this short on the model on the pattern envelope.

Can you tell which button I neglected to do?
Further proof?  Here it is from the back.


So, full bust adjustment or not, the back is too small.  See all the pulling?  My pattern fitting did not look like this.  I took photos and everything because I suspected that the back might be too small.  Which brings us to . . .

Lesson #2:  Measure the pattern to verify that it will not only fit you but also have the appropriate design and wearing ease, particularly when your fabric has no stretch.

-and-

Lesson #3:  Don't go months without sewing wovens because stretch fabrics are easier to fit and faster to sew.

Here it is on the hanger.  Isn't it pretty?
That being said, I love this pattern so much that I'm headed to Joann's on Saturday so that I can get another copy to correct my fitting mistakes before this week's Simplicity pattern sale ends.  I guess this version will have to stand both as a muslin and as a practice piece.

This was my first time using a pattern that had a cup size, but I had been warned that I might want to go up to a D cup instead of my usual C.  That was so right, because I still had to add a 1/2 inch FBA, and I really don't think that was because of making the wrong size.  In spite of this, I loved the cup sizes because I'm always convinced that I distort bodices with my usual 1-2 inch FBA.  My only issue?  A smaller FBA means that you make smaller adjustments to the rest of the pattern, and if you rely on the full FBA adjustments to make other parts of the pattern large enough (like I do), you could find yourself with a garment that just doesn't work the way you expected it to.  On the plus side, I do think that I've mastered the simple sleeve alteration because I did a 1 inch enlargement, and that turned out perfectly.

Lesson #4:  When you do something for the first time, make sure that you really understand what you're doing before you do something permanent like cut your fashion fabric.

I thought that the instructions were fairly clear.  Others who have made this pattern have mentioned that the instructions jump around, and they do, but with as many different variations in both the bodice and the sleeves, I'm not so sure that couldn't be avoided.

You can see here my coordinating waistband facing.
I didn't pay enough attention to the pattern instructions, so I ended up only cutting two of the front waistband.  If I'd gone through the pattern more thoroughly and paid attention to how many fabric pieces each pattern piece needed, I would have realized that the waistband was self-faced.  I improvised and used a white shirting for the waistband facing, both front and back.  In retrospect, I think that worked out better.  The fabric is a very sheer voile that I chose not to underline as I planned to wear this with a white silk camisole.  Having both the outer fabric and facing with a pattern on it might have just ended up looking muddy.

Lesson #5:  Read through all of the pattern instructions, no matter how boring it is.  Don't just wing it.

-and-

Lesson #6:  Don't dispose of your extra fabric until the project is finished just in case you forgot to cut something.


Because the fabric was so sheer, I decided to try French seams.  And aren't they beautiful?  They were so much easier than I thought they would be, and they do look lovely from inside and out. 

peplum a good three inches.  Other than that, there aren't any changes that I would make. 

So, I guess the only question that remains is what do I do with my gorgeous blouse?  I'm too proud of it for it to go in the donation pile, but I don't know anyone who it would fit both physically and style-wise  Maybe I can frame it and hang it as art in the sewing room.

Wednesday, February 9, 2011

Poppies For A Weary Mind

Sorry about the protracted absence.  Our virus program ate our computer, and we've only just gotten it straightened out.  There's also been some personal drama (not the least of which was a broken tripod), and I can say with great certainty that 2011 is letting me down already.  Unfortunately, this also means that my sewing time has been drastically reduced, but I hope that this is, likewise, straightened out.

So, without further ado, here is my first finished garment of 2011, Simplicity 2580.  I finished this dress right after the new year, so my memory of this might be a little hazy.  I picked up this ITY jersey from Fabric Depot on a whim when my only purchase was supposed to be interfacing.  I loved it so very much for its bright colors and abstract poppy pattern, and I dug through my patterns searching for something that wouldn't complete with the happy spring flowers.  I was originally going to make View C but ended up using the cowl neckline from View D instead.  I'm glad that I did because I don't have to wear a cami under the dress for work.

Nephew J is making a cameo appearance.
There are a lot of things to like about this dress that have nothing to do with the snazzy fabric (although that's part of the attraction in my book).  It's simple, first of all.  Just seven pieces, and it would only have been six if I'd cut the skirt back on the fold which is entirely possible.  In fact, I'm not even quite sure why there is a center back seam in the skirt at all.  The self-facing of the top front is very neat and while I had a few problems picturing how it went together in my head, I just followed the instructions and trusted that this would all work out.  I followed the instructions as drafted, but had to do some futzing to get the folded portion of the cowl to line up with the finished back neckline without gapping.  I will probably make the v-neck version, too and plan to attempt the Slapdash Sewist's excellent tutorial for finishing the neckline on that version.

Tripod fixed.  Can finally get my ladypose on.  Note to self:  Watch ANTM for pointers.
About the sleeves, while I love the little flutter sleeves, I think that the instructions could be a little more clear about whether the ends of the sleeve are supposed to meet at the bottom of the armscye or overlap slightly.  If they're just supposed to meet, it takes a bit of maneuvering to get them inserted and sewn correctly.  If you don't get this just right, part of the underarm ends up being left unfinished. 

So, the 10 pounds I put on over the last very bad year apparently went straight to my butt.
Overall, I really liked this pattern.  It's a great little dress, and I've been relying on stretchy clothes over the past couple of months because of the weight gain while my father was undergoing chemotherapy and other treatments that exploded all over the place for most of the fall and part of January (the flyskim Dad remains cancer-free following his most recent pet scan, by the way).  It was nice to be able to put something together and be finished over a weekend as I've also had a lot of problems sustaining productivity with everything that's been going on.  Based on the weekly wear that this dress has been getting, I'd call this a major success. 

I recently also finished McCalls 5974 and will report on that over the weekend. 


However, that is going to be the last stretch fabric for a little while.  I need to work on properly fitting woven fabrics again and get back to several projects that have been allowed to languish since last fall. 

Wednesday, November 24, 2010

Best Laid Plans

So, here is what was supposed to be my Thanksgiving dress as it currently stands. It just needs a hem, and it's done. The problem is that I don't think that the skirt is particularly flattering.

Hmmm, now that I see a picture, it's not so bad. So confused now. And why did I bother to put on shoes?
I suspect that this is due to the fabric not having much (or any) body, so this goes at the end of my growing list of garments made with bad fabric choices.

I have to remember to stand further away from the camera.
The good news is that the pattern comes with a straight skirt option, and there is enough fabric in the skirt to make it. The bad news is that there is no way that this is going to be worn on Thanksgiving. I just don't have enough time between now and then to remove the zipper and skirt, fit the pattern, recut the skirt and reassemble everything by Thursday. So, we'll hit this hard again after the holiday, and I hope to have a new dress for my work team's holiday happy hour bash.

Thursday, September 16, 2010

Autumn is a Mosaic

My stylist in action.
Finally!  A finished object!  A dress to be exact.  This is my version of Simplicity 2369.  I made View B but with the front wrap from View A.  The fabric is this beautiful ITY jersey that looks like a mosaic that's been sitting in my stash since last summer, and I think it's a great match for the pattern.

My legs aren't gray.  They're tights.  Lavender.  It made sense this morning.
I was thrilled at how easy this came together, particularly the raglan sleeve.  What a fabulous thing not having to set in a sleeve is, not that you really worry about that with a knit anyway.  The instructions provided were great and easy to follow, although I sewed the sleeves in flat and then sewed up the bottom seam when I finished the side seams.  I made a 14 on top and graded out to a 16 at the hips, but I could have made a 12 on top.  As it was, I found this a little loose in the 14 and had to go back and do some hand sewing to take some of the fabric out of the front wrap piece.  (There was no way I was picking out the serged seam.)  I also added a fourth pleat to the front wrap piece where the tie attaches to take out some of the volume.
 
That's it at the bottom.
I did a lot of hand basting for this dress.  Although the fabric pattern is small and busy, I still wanted to at least have all of the little tiles sort of line up.  I was satisfied with the end result, although if you get too close, you'll see that it's a little off.  I tell myself that if someone is close enough to inspect how the pattern lines up on the seams of my dress, they're either (a) my husband, in which case, he's not going to notice; or (b) some crazy stalker, in which case, I'll have more pressing problems than just a little bobble in my pattern matching.


You'll have to excuse this picture not being very clear.  There's just something about the word X-large and a picture of my backside that I don't want getting together.
I tried a new way of hemming the bottom.  I did a very narrow zigzag which looks like a straight stitch but still has some flexibility.  I put in two lines of stitching close together to mimic the look of a coverstitch.  The biggest problem was the bulk at the seams.  My machine didn't handle them well, and the stitching went all wonky on the first seam I reached.  The others are fine, but I couldn't sew straight for this seam to save my life.  It's the side seam on the right, and I'm trying to figure out how much this bothers me before I commit to fixing this.  I might just leave this as is so that later, I have visible proof that I got better at this.  Assuming that I get better at this.

Wow.  Not pretty.  I still really kind of suck.
I really like this dress, and I'll get a lot of wear out of this.  The colors are perfect, the fabric is soft, and the dress looks great under a cardigan for those days when the office heat isn't being all it can be.  I do want to make a version of this with the sleeves from View A in the future.  Maybe out of a solid. 

Bonus shot of the beauteous Pip.  Because everything is more aesthetically pleasing with kitties.
All in all, this was a great success after my run of mediocre glorified t-shirts.  Next, it's the start of my Lady Grey coat.  I've got all of the pattern pieces cut out.  Tonight, I'll prep them for a pattern fitting.  Then, on to the muslin.  I'm going to try the method outlined by Gertie in her post from this morning.  I hope to be posting regularly about the whole process.

Thursday, August 5, 2010

Is It Fall Yet?

Helen: Oh, Jakey, do you realize what a momentous summer our girls have had? Quinn learned she's smarter than she thought, and Daria has her first boyfriend.

Jake: It's summer already?

Actually, for the past two weeks around the San Francisco Bay Area, you wouldn't have known that it was summer.  It didn't top 75 degrees the entire time I was there which was fine with me because I was not meant to survive with the temperature much above 80.  But now I am back in Portland with its actual summer weather, and I dream of fall.  Tights?  Yes, please.  Boots?  Definitely.  Sweaters?  Did I ever really take them off?  So here are the projects that I have planned going into fall.


I've been saving a wonderful piece of two-way stretch wool knit for the past two years for just the right pattern, and I think this is it.  I'm planning the above dress for Thanksgiving with Mr. flyskim's family.  The fabric is this really pretty raisin color, and I think it will be perfect.  Okay, given my recent lack of success matching fabric to pattern, I hope it will be perfect, and I'm trying not to psych myself out so much that I'm afraid to cut into the material.

Please ignore the cat hair. 
View A
This calls for a two-way stretch knit, and I just happen to have one lying around my stash with enough yardage to put together a dress.  I hope the pattern isn't too busy for the neckline detail.  I think this will be great with a cute little cardigan and some tights.


View D.  I know that a bold floral doesn't necessarily scream fall, but this cotton jacquard has a good weight, the colors are rich and the pattern is smoke-like.


Either view C or D.  I haven't decided which one, yet.  I'll have to see how my fabric drapes.  I'm thinking of using this large-scale plaid pattern.  It's a poly suiting, but it feels really nice, and I think that it will make a great modern interpretation of a kilt.  No giant pin holding the layers together, though.


Fall in Portland is relatively mild, so I can use a great blouse.  I've been wanting to make this forever (well, at least since the pattern was published), and it's going into the production queue.  I'll make view F with the short sleeves.  


This is a Liberty print that I picked up from Josephine's Dry Goods back in February, I think.  I got it because I thought my dad would get a kick out of it.  After it's done, I'll have to make sure I wear it around him.  The print is really small scale, and I love that it's mostly neutral.  I'm also going to make a simple skirt out of the stretch twill below, but I'm not sure which one, yet.


Saturday, July 31, 2010

It Doesn't Look Too Bad From This Angle

But don't let that fool you.  I have the skirt pinned within an inch of its life.  The picture below is my attempt at Simplicity 2579, and it didn't work at all.  I managed the full bust adjustment fine, but the real problem with this dress for me is the skirt.  First, the skirt puffs out at the sides where it attaches to the midriff piece.  Then there's the puffery at the gathers in both the center front and back.  I wish I had taken a picture of the side view because I looked like I was carrying twins; one in front and one in back.  I suppose that this is really my fault because a review of the recommended fabrics shows that this pattern is meant for something drapey and not my crisp little cotton lawn with its pretty green and blue morning glories.

Please note the bird decoupage.  That is an original flyskim piece from 5th grade.
Luckily, I has some fabric left over and the skirt is made out of several large pieces, so there is enough of this lovely fabric to try something else.  Enter Butterick 5485, view C.


Because this is a faux wrap, I have barely enough fabric, but I do.  In fact, the only reason this works at all is because the bodice pieces are cut on the bias.  I picked apart the unfortunate dress above and have altered the Butterick pattern, although I want to make a muslin of this before I cut into the fashion fabric.  I really don't have any room for error.  I plan to wear this to the wedding of two of Mr. flyskim's dodgeball teammates (that's right, dodge ball) the weekend after I return home.  Their reception is in an upscale school gym (I feel like I'm going to homecoming), so a game might break out.  I will be hiding in the girl's room if that happens.

Sad little pile of fabric and lining.
I'll be working on this the minute I return home in hopes of having the dress ready for the following weekend.  I think that this dress will be really flattering, and I love this fabric very much.  I'm very excited and have the perfect cardigan to wear with it.